title

:: me! ::

My photo
CAN'T LIVE WITHOUT: Family. Friends. Hounds. Books. The Beach. Autumn. Cameras. Computer. iPhone. The color orange. Caramel frappucino. The words "dude!" and "nice!". Oh...and world peace ;-)

follow me

Follow Me on Pinterest

Labels

Project Life 365 (165) Tips and Tricks (20) babies (16) family (32) kids (113) newborn (8) pets (5) promotions (22)

pin it

Showing posts with label People Pictures Exercises. Show all posts

14 May 2012

:: exercise #11 results {people skills} | 30 people pictures ::

My most vivid memories of my mom always involve her sewing (my dresses), knitting (my stuffed toys) and drawing/painting (my BROTHER's art projects). She was a high school teacher back in the day, so we had her all to ourselves after school and during the summer.

To this day, I still bring my clothes to her for mending. I know enough to make small repairs, but nothing like the magic mom could do. Now when my children's clothing or stuffed toys "malfunction", they automatically put the item(s) in their backpacks so they can bring it to Grandmommy's house for mending.

For this week's People Pictures exercise & for Mother's Day, I decided to take some portraits of my mom. I wanted to make sure I document this important memory for me and my children. To set up the shoot, I asked mom if I could take pics of her while she helps me alter O's dresses. We chatted casually the entire time (about 15 minutes), and I think I've captured what are most important to me -- her generosity, her perseverance and her love of family.

Seeing her with my little ones warms my heart. I'm so glad my children will have the same fond memories of my mom that I had as a little girl.

Happy Mother's Day to the most amazing mom and grandmommy in the world :-) We love you!!!

08 May 2012

:: exercise #11: people skills | 30 people pictures ::


SPECS
  • Goal: Develop people skills.
  • Tools: Camera and lens of your choice.
  • Light: Depends on location.
  • Location: Indoors or outdoors.
  • Theme: MAKING THE CONNECTION.
  • Duration: 30 minutes for photo shoot.
CHALLENGES
  • Step 1: {Make Eye Contact}Focus your eyes, pause and connect with your subject
  • Step 2: {Active Listening with a Friend} Actively listen and ask good questions.
  • Step 3: {Where the Rubber Meets the Road} Photograph someone who interests you. Arrive early for the shoot. Greet the subject. Give her a small gift to show your appreciation.
  • Step 4: {Cut to the Chase} Begin the shoot and keep it completely conversational. Keep her engaged with asking questions and listening. End the shoot early and thank the subject for her time.
  • Step 5: {Acknowledgement and Thanks} Show your appreciation by following up with a handwritten note -- no texting or email allowed!

07 May 2012

:: exercise #10 results part 3 {arms length} | 30 people pictures ::

Here we are, at the conclusion of exercise #10 of the People Pictures exercises. This is what I've learned:
  • Empathy for my clients -- It is much easier to hide behind the big camera than to be in front of it.
  • Bracketing exposures -- Since I shoot in manual mode, I had to set the exposure recipe intuitively and then tweak it to get it right. Although I usually use the center auto-focus point, for this, I put the AF on auto for better results.
  • I definitely have a "better" side :-)
  • Photoshop is a middle-aged woman's best friend.
I shot this image in my workspace, with the camera slightly overhead at arms-length. I used the lowest possible F-stop (1.2), in hopes of blurring some of the "no-so-desirable." Of course there is some "photoshopping", but I left the multitude of freckles alone for authenticity :-)

Happy Monday! Please check back tomorrow for the intro to Exercise #11!

30 April 2012

:: exercise #10 results part 2 {self-portrait} | 30 people pictures ::

So this is me. Doing what I normally do during the day. Working on my computer and playing with my kids and their friends outside our house. I would've loved to have taken a self-portrait at the beach (my favorite state of being), but the weather had other plans :-)

Dont' forget to check out the brilliant works of my fellow photogs:

23 April 2012

:: exercise #10 results part 1 {reflections} | 30 people pictures ::

Reflected images are really quite interesting. The added dimensionality makes them surreal...a little bit of "Alice in Wonderland" almost. What I see in the reflection goes beyond the mirror-like surface. Instead, I see past experiences, current thoughts and future unknowns -- a focused image of self-consciousness surrounded by swirls of internal subconsciousness. Sounds a little psychedelic, but sure beats agonizing over the acne blemish planted in the middle of my forehead :-)

As you've probably guessed, I LOVE iPhontography (or is it iPhonography???). It's instant gratification for the visually obsessed. So for this week's exercise, I am using my iPhone and Camera+ app, instead of my 50 mm. Here are some images from our visit to the "Suprasensorial" exhibit at the Hirshhorn this morning.


Requisite stop.


This one is not a reflection (as hard as I tried to get a shot of my shadow bathed in this incredible neon), but thought it was a cool installation nonetheless.


Dont' forget to check out the brilliant works of my fellow photogs:

17 April 2012

:: exercise # 10: self-portrait | 30 people pictures ::


SPECS
  • Goal: Create 30 self-portraits.
  • Tools: Camera and 16-35mm or 50mm lens.
  • Light: Light or available light.
  • Location: Indoors or outdoors.
  • Theme: HONEST AND TELLING SELF-PORTRAITS.
  • Duration: 60 minutes
  • Subject(s): You!
CHALLENGES
  • Step 1: {Reflection Self-Portrait} Photograph yourself in any type of reflective surface -- up close and far away, vertical and horizontal.
  • Step 2: {Outdoors Self-Portrait} Using the self-timer and NO tripod, create well-composed photos of yourself out in the world.
  • Step 3: {Arm's-Length Self-Portrait} Use a wide angle (16-35mm) or normal (50mm) lens, hold your camera at arm's length and point it toward you -- positioning camera high & low.
  • Step 4: {Post-Photo Shoot Reflections} After the shoot, jot down what you learned from this exercise, both in being the subject and how you appear when you are shooting others.
__________________________________________________________________________

This is going to be a revealing exercise. Check back next Monday for the results!

09 April 2012

:: exercise 9 results {your portrait} | 30 people pictures ::

Alright. I've failed this week's assignment. True, I don't love having my portrait taken, but I really wanted to experience what it's like to be the one in front of the camera. In fact, I was even ready to let Architectdad (who has a really great eye for people pictures) use my camera to take portraits of me. Alas, life got super busy this week and we never got around to it. I will file this one away and promise to finish it one day :-)

03 April 2012

:: exercise #9: your portrait | 30 people pictures ::


SPECS
  • Goal: Develop empathy for your photographic subjects. Learn from experiencing how another photographer works.
  • Tools: Journal to record your thoughts & reflections.
  • Light: Light or available light.
  • Location: Indoors or outdoors.
  • Theme: THE OTHER SIDE OF THE LENS.
  • Duration: Two photo shoots, 30 minutes each.
  • Subject(s): You!
CHALLENGES
  • Step 1: {Contact Two Photogs} Find two local photographer or friend whose work you admire.
  • Step 2: {Photo Shoot} Observe how the other photographer works. Let go of control and let the other photographer lead the way.
  • Step 3: {Photographer Interview} Interview the photographer after the shoot. Write a list before the shoot.
  • Step 4: {Post-Photo Shoot Reflections} After the shoot, jot down the photographer's strengths and weaknesses, then write down how you'd change or modify your own process.
  • Step 5: {Repeat the Process} Repeat this process with a second photographer.
___________________________________________________

This is going to be HARD for me to comply. I am terrible in front of the camera. I fidget, I squirm and I smirk -- none of which look good on camera. Not to mention the fact that I am, ahem, a bit of a stubborn control-freak. I suppose that's exactly the point of the exercise, isn't it?

On the other hand, I'd love to see how other people work and learn from them. Alright, we'll see what if I am able to get through this exercise without breaking into hives :-)

02 April 2012

:: exercise #8 results {drawing a visual map} | 30 people pictures ::

Exercise #8 asks us to really dig deep and visualize what who we really are and what makes us and our photographic work uniquely ours. It also asks us to layout a road map, if you will, of what we'd like to achieve with our photography in the future.
I found myself analyzing the past (tragedy/loss), taking inventory of the present (word self-portrait & interests/passions), and projecting into the future (connections & goals). It is a process that I think should be renewed regularly in one's life. With a deeper understanding of how we got to the here and now, we are better able to set meaningful goals for ourselves and achieve them. Ultimately, my goal is to be able to distill honest, story-telling pictures by connecting emotionally and intellectually with my subjects and viewers.

One of the most profound experiences for me as a child was moving to the U.S. with my family & adjusting to a brand new way of life. While I found it hard to hold onto the culture into which I was born, I've come to appreciate it more and more each day -- especially when looking at my children, and imagining how rich their experiences will be growing up "mixed" in a diverse yet increasingly blended society.

I'd like to make a series of narrative portraits about children from all over the world -- little global citizens -- with particular emphasis on children with multi-cultural backgrounds. Not the sterile United Colors of Benetton ads, circa 1984, but more meaningful portraits in temporal and geographical context.

Here is one of my little global citizens:


To see what my fellow photographers thought about this exercise, please visit:

27 March 2012

:: exercise #8: drawing a visual map | 30 people pictures ::


SPECS
  • Goal: Create 4 visual maps.
  • Tools: Colored pens and paper.
  • Light: N/A
  • Location: N/A
  • Theme: RESONATE --> Becoming in tune with who you are.
  • Duration: 15 minutes per visual map.
  • Subject(s): N/A
CHALLENGES
  • Step 1: Visit www.visualthesaurus.com to familiarize yourself with visual maps.
  • Step 2: VP #1 {WORD SELF-PORTRAIT} --> Select a favorite colored pen and write your name in the center of a new page. Write down 30+ adjectives that describe who you are with a variety of different-colored pens. Circle the ones you think fit best and connect the words with lines.
  • Step 3: VP #2 {TRAGEDY/LOSS} --> Write your name in the center of a new page using a dark colored pen. Use a muted-color pen to write down tragedies or loss you've experience in life -- be sure to include loss from the different stages of life. Write down the quote, "From crisis comes opportunity." Write notes about how certain challenges have shaped who you are.
  • Step 4: VP #3 {INTERESTS/PASSIONS} --> Write your name in the center of a new page. Write down all of your interests, passions, sports, and hobbies that you've pursued throughout your life. Go back and circle items that stand out most.
  • Step 5: VP #4 {CONNECTIONS} --> Write your name in the center of a new page. Write down 30+ of your current connections in life. Write down connections that you would like to pursue in the future.
  • Step 6: VP #5 {GOALS} --> Write your name plus the word photography (or your photography business name) in the center of a new page. Write down 25+ photographic goals you'd like to achieve. Circle the top 5.
  • Step 7: Tack up your completed visual maps on the wall. Consider how this exercise can help you make images that resonate with who you are. Share your maps with a few friends and write down 10 people pictures that you would like to make in the future. Save this list. You can use it in later exercises in the book.
PRODUCT
  • Four visual maps + list of 10 people pictures you would like to make in the future.
For more tips and inspiration, please read Chris Orwig's "People Pictures."

____________________________________

**Since the parts of this exercise are of a more personal nature, I will not post my visual maps here. However, I will try to give a summary of what I learn about myself from this exercise and the photos I want to make in the future.**

26 March 2012

:: exercise #7 results {descriptive portraits} | 30 people pictures ::

My 3 children are like characters out of a Dr Seuss book -- their little personalities are colorful, occasionally non-sensical, yet complex. So for this assignment, I decided to capture portraits of one of my Bar-ba-loots in her natural habitat as inspired by the maestro's work.


To see my fellow photographers' descriptive portraits, please visit:

20 March 2012

:: exercise #7: descriptive portraits | 30 people pictures ::


SPECS
  • Goal: 10 descriptive portraits
  • Tools: Camera; normal or telephoto focal-length lens.
  • Light: Natural or available light.
  • Location: Your choice.
  • Theme: PORTRAITS INSPIRED BY CREATIVE USE OF WORDS.
  • Duration: 10 minutes per photo shoot.
  • Subject(s): Anyone.
CHALLENGES
  • Step 1: Brainstorm for 15 minutes and generate portrait ideas based on creative descriptions or words.
  • Step 2: Select & write down the best 5 to 10 ideas from the brainstorming.
  • Step 3: Sketch out a few locations & people you'd like to photograph based on your favorite ideas.
  • Step 4: Review your favorite ideas right before the shoot & use them as internal guides to bring your ideas to life.
PRODUCT
  • Ten descriptive portraits.
For more tips and inspiration, please read Chris Orwig's "People Pictures."

12 March 2012

:: exercise #6 results {less is more} | 30 people pictures ::

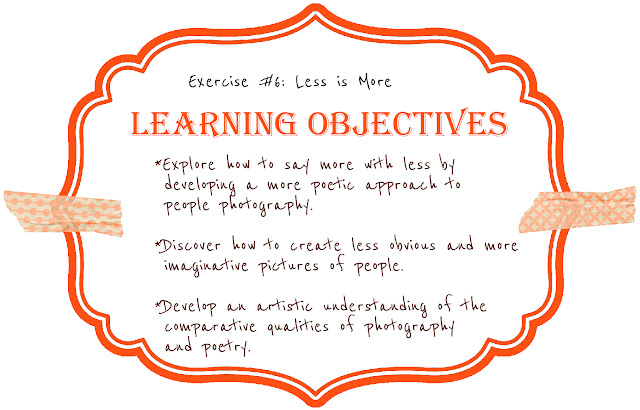
For Exercise #6, we were supposed to explore the poetic aspects of people pictures -- to make thoughtful and reflective shots which are simple yet profound.

Ever since I was a kid, I've always been fascinated by e.e. cummings's work. Oh, how I wanted to be just like e.e. -- I swear I didn't start re-capitalizing my words until I started architecture school (where everything written in a drawing is capitalized).

Cummings's poems are intriguing in that their true meanings are not always clear-- yet they evoke very strong sensory experiences in the reader through rhythm, rhymes and punctuation. The poem "a pretty a day" is a perfect example of how he uses words to manipulate how one experiences simple,everyday objects (flowers), in order to evoke a deeper emotional experience.

While I was in NYC last weekend, I took some head shot portraits of my friend, A,  for this exercise (see the narrative portrait of A from Exercise #5). Like e.e. cummings's poems, a good head shot should be simple, yet be able to convey the more complex mix of personality and experiences of your subject. My friend is a talented actor, who is a Broadway wardrobe dresser, who is my photography mentor, who is also the loving dad of the gentlest bull-mastiff in the world. All four portraits are taken with the Canon 5D Mark ii, 50 mm F/1.2 L prime lens, indoors with natural light from large windows.


See my fellow photographers' "less-is-more" portraits:

Abbey Road Designs
Claudia Muir Photography
GSG Photography
Elaine Janet Photography
What Eyes See Daily
Workshop Group

06 March 2012

:: exercise #6: less is more | 30 people pictures ::


SPECS
  • Goal: 10-15 poetic pictures of someone.
  • Tools: Camera; normal or telephoto focal-length lens.
  • Light: Natural or available light.
  • Location: Simple setting.
  • Theme: POETIC PICTURES.
  • Duration: 30 minutes
  • Subject(s): Someone who fits into a specific category, yet has additional point of interest of appeal. Example: a surfer who also plays in a band and has a PhD in astrophysics.
CHALLENGES
  • Step 1: Find a subject who fits into a specific category, yet has additional point of interest or appeal.
  • Step 2: Choose a location with nice natural light but not overly complex.
  • Step 3: "Reduce, simplify, and deepen." Arrive to the shoot a few minutes early to have enough time to read through the lines of a favorite poem or song. Take a deep breath and slow down.
  • Step 4: Look for shots that are less obvious and straightforward. Try camera-tilt or changing camera height, all the while moving your body with a natural fluidity and ease.
  • Step 5: Print 15 pictures in a smaller size and hang them on a twine and clothespins. Experiment with the sequencing and see which photos best create a poetic reflection of the shoot.
PRODUCT
  • 15 poetic pictures.
For more tips and inspiration, please read Chris Orwig's "People Pictures."

05 March 2012

:: exercise #5 results {narrative portrait} | 30 people pictures ::

What a weekend I've had! New York City is, by-far, one of my favorite cities. I didn't realize how much I missed the impossibly tall buildings, the swirl of diversity, even the dog sh*t in the middle of the sidewalk in the East Village. I just feel different when I'm there. More in my element, somehow.

Not only did I get to work alongside a few of my talented colleagues from all over, on some fun shoots in Central Park (photos coming soon), I got to spend some quality time with dear friends whom I've not seen in ages.

This is a narrative portrait of my good friend Andrew sitting in his Brooklyn apartment. He is one of the most hard-working people I know, and I love being able to capturing a quiet, relaxed Andrew at home. I chose this man-of-many-talents as my subject for this week's exercise because he is perfect for it -- he is the costume dresser for the Phantom character on Broadway's "Phantom of the Opera", AND a talented actor to boot. Did I mention that he is also my one and only photography mentor? Not only did he shoot our wedding for us, he used his Broadway expertise to sew the spaghetti strap back onto my Angel Sanchez wedding gown.

Andrew's colorful personality is as big as his generous and caring heart.  I am so proud to call him a friend. Please visit his website and check out some of his latest work.


See my fellow photographers' narrative portraits:

Abbey Road Designs -- http://abbeyroaddesigns.blogspot.com/
Claudia Muir Photography -- http://claudiamuirphotography.com/blog/
GSG Photography -- http://gsgphotography.wordpress.com/
Elaine Janet Photography– http://elainejanet.com/
What Eyes See Daily -- http://whateyesseedaily.blogspot.com
Group -- http://dc2011women.blogspot.com/


28 February 2012

:: exercise #5: narrative portraiture | 30 people pictures ::


SPECS
  • Goal: Single narrative portrait.
  • Tools: Camera; normal or telephoto focal-length lens.
  • Light: Natural or available light.
  • Location: An environment that acts like a stage.
  • Theme: NARRATIVE PORTRAITURE.
  • Duration: 30 - 45 minutes
  • Subject(s): Someone with an interesting personality, is dramatic, or has a vibrant point of view.
CHALLENGES
  • Step 1: Find a subject with an interesting personality, is dramatic, or has a vibrant point of view.
  • Step 2: Choose a location with small details that set the stage for your storytelling.
  • Step 3: Welcome the subject & explain your idea for the visual story that you want to tell. Shoot for 30-45 minutes in a free-flowing way.
  • Step 4: Print one single frame and tack it up on your wall. Ask others for feedback and consider their advice.
PRODUCT
  • ONE narrative portrait.
For more tips and inspiration, please read Chris Orwig's "People Pictures."


21 February 2012

:: exercise #4: 3 days of portraits with b/w film | 30 people pictures ::


SPECS
  • Goal: 30 black and white people pictures.
  • Tools: Film camera; lens of your choice.
  • Light: Natural or available light.
  • Location: Outdoor or indoor.
  • Theme: ENDURANCE.
  • Duration: Three different days.
  • Subject(s): family, friends or strangers.
CHALLENGES
  • Step 1: Find a FILM camera.
  • Step 2: Choose film -- try the classic B/W Kodak Tri-X.
  • Step 3 {Day 1}: Pound the pavement and capture 10 pictures of people.
  • Step 4 {Day 2}: Make 10 window light portraits by positioning subject next to a window without directional or direct sunlight. Bracket exposure (underexposed, properly exposed, overexposed).
  • Step 5 {Day 3}: Make 10 outdoor portraits.
  • Step 6: Make prints of the 30 portraits by sending the film to photo lab.
  • Step 7: Reflect on this experience and write down what results you hope to find; set aside 5 top portraits and tape them to your journal; if none turned out nicely, repeat Steps 1 -7.
PRODUCT
  • 5 out of 30 BW portrait prints (from film) to put into your journal.
For more tips and inspiration, please read Chris Orwig's "People Pictures."

~~~~~~~~~~~~~~~~~~~~~~~~~~~~~~~~~~~~~~~~~~~~~~~~~~~~~~~~~~~~~~~~~~~~~~~~~~~~~

My first reaction to this exercise was: Holy @#$% !!! Where am I going to find a film camera and how in ^&*@ am I going to be able to make 30 worthy FILM portraits without giving myself a coronary?!

But that's just the point, isn't it? When we step out of our comfort zone, that is when we really challenge ourselves. While I haven't used a film camera since my little stainless steel point-n-shoot from 1997, I would love a chance to try a Holga 120. For $39.99 (+ $3.49 for a roll of BW Holga film), it is certainly within reason.  On the other hand, if anyone is willing to lend me a film SLR, I'd love to experiment with that as well :-)

Holga Glo 120N Plastic Medium Format Camera (Orange Burst)


Since this exercise requires a lot of heart, sweat and time, let's leave the deadline open. The point of the exercise is to test your endurance and resolve -- keep trying to make great film portraits until you GET.IT.RIGHT. Realistically, however, most people don't have the luxury of dedicating a chunk of contiguous time to an exercise like this. So let's take it one step at a time and make it as enjoyable as possible. I will post my results as soon as I am able, but will post updates in the meantime.

Have fun experimenting!

20 February 2012

:: exercise #3 results {defining your style} | 30 people pictures ::

As a recovering architect, I have always defined my style in architectural terms:

CLASSIC MODERN (Bauhaus, Mies van der Rohe, le Corbusier) with a touch of CHARLES + RAY EAMES = Form Follows Function with a touch of nostalgic softness.

This week's "People Pictures" exercise allowed me to think about "my style" in terms of objects, colors, music and food, which in turn reinforced what I already know about myself and my craft. I encourage everyone to do this exercise -- it will help you clarify/define your style and hopefully you'll also discover something about yourself.


{5 out of 25 Favorite OBJECTS} ribbons | lighting | bag | balloons | stationary

{RIBBONS} colorful, textural, seemingly infinite in one dimension, while finite in the other dimension = one point perspective (photo courtesy of Our Labor of Love)

{LIGHTING} one purpose (to illuminate), yet so many ways of doing it (uplight, downlight, diffused light, spotlight)

{BAG} form follows function with the promise of adaptive use and evolution (Jack Spade Coal Bag = my camera bag)

{BALLOONS} idealized happiness + innocence (Tumblr.com)

{STATIONARY} visually and/or verbally communicative, purposeful and tactile (photo courtesy of Elum)

{Seasonal COLORS} I adore the color ORANGE. To me, it is mercurial, lovable and charismatic. It is unstoppable and can be morphed to fit into any color scheme/season. I'm still not sure which season best describes my photographic style, but perhaps an elegant yet complex shade of orange???


{SPRING} optimistic, hopeful, fresh


{SUMMER} vibrant, lively, lush


{AUTUMN} dreamy, quiet, contemplative
{WINTER} easeful, content, serene
(all color palettes by design-seeds.com)

{IDEAL WEATHER for Photo Shoot} Clear sunny day with puffy cumulus clouds. Preferably filtered late afternoon sun.

I love this image because 1) I had beautiful subjects and 2) the light quality of the early autumn afternoon light was AMAZING.

{MUSIC Style} An interesting combo of Nina Simone | Leonard Cohen | Eva Cassidy | New Order. Classic, with dashes of bohemian + electric . I find that what I listen to while editing depends on the feel that I get from my clients and their session. I try to really FEEL the emotions of the story that I've captured , and music allows me to insert myself into these intimate moments. To hear some of my favorites, click on my Playlist tab above.

{FOOD Style} Cupcakes. Cupcakes. Cupcakes. I know cupcakes are now considered passe, but what's not to love?! It is delicate, colorful and sweet. It is childhood perfection personified.


This was a looong exercise, but I thoroughly enjoyed learning more about myself and my stylistic vision. Read about my fellow photographers' self-discovery and photographic styles:

Abbey Road Designs -- http://abbeyroaddesigns.blogspot.com/
Claudia Muir Photography -- http://claudiamuirphotography.com/blog/
GSG Photography -- http://gsgphotography.wordpress.com/
Elaine Janet Photography– http://elainejanet.com/
What Eyes See Daily -- http://whateyesseedaily.blogspot.com
Group -- http://dc2011women.blogspot.com/

14 February 2012

:: exercise #3: defining your style | 30 people pictures ::


SPECS
  • Goal: Use verbal descriptive terms to define your style and/or the style you would like to have.
  • Tools: Pen, journal, magazine images, images from your favorite photography sites.
  • Light: N/A
  • Location: N/A
  • Theme: WHAT IS YOUR PHOTOGRAPHIC STYLE?
  • Duration: open
  • Subject(s): N/A
CHALLENGES
  • Step 1: Brainstorm about physical objects for 15 minutes, write down 25 items & circle 5.
  • Step 2: Write down the colors you associate with Winter, Spring, Summer & Fall. Create small color palettes for each season & write about the moods that each season evokes in you. Choose the color palette and mood that best describe the style of pictures you would like to make.
  • Step 3: Write down the ideal weather for your ideal photo shoot. Describe the weather that matches the photographs that you want to make.
  • Step 4: Pick a musical piece/music style/composer that best accompanies the type of pictures you'd like to make.
  • Step 5: Make a comparison of your photographic style to food.
PRODUCT
  • To be able to verbalize the essence of the photographs that you want to make. To have a clear vision of a cohesive style that is uniquely yours.
For more tips and inspiration, please read Chris Orwig's "People Pictures."

13 February 2012

:: exercise #2 results {clarifying your craft} | 30 people pictures ::

This week's "People Pictures" exercise is all about CELEBRATION, COLLECTION and CRITIQUE of the visual world around us. An objective of this exercise is to establish habits/routine that we can incorporate into our lives that will help clarify our artistic vision.

As a recovering architect, this exercise was right up my alley. I still often have flashbacks of crits and presentations from the biz -- think post-traumatic stress, rather than sweet nostalgia. However, one very important skill that I learned from being in the profession -- for which I am grateful -- is visual analysis of all things, well, visual. In many ways, I was encouraged to celebrate my natural penchant for beautiful "things" -- buildings, objects, art etc. I was encouraged to collect and document them in a multitude of ways -- sketch, paint, photograph etc. I was taught to think critically about what makes "something" appealing and visually successful.

Instead of tearing and pasting images into a journal, I decided to document my exercise with iPhone photos and Pinterest boards. Sure, there is something to be said about the tactile quality of paper, glue and pen/pencil (as my old-school profs and colleagues would agree). However, I feel that the collecting of imagery through electronic means is equally valid in this day and age. Of course, I was also one of the few people in my program who presented the master's thesis project using computer generated drawings and images (gasp!).

Here is my journey of CELEBRATION, COLLECTION and CRITIQUE in pictures:


CELEBRATE something that I naturally enjoy -- visiting a museum (Hirshhorn).


COLLECT images that I love (American Photo Mag, NGS & rodneysmith.com)

CRITIQUE | What makes a people picture good or great? A great portrait is the perfect blend of fiction and non-fiction -- a beautiful story that awakens your imagination, yet carries meaning that grounds it in reality. ~Leslie C.

Photo of a geisha applying lipstain by Jodi Cobb
This photo by Jodi Cobb has the perfect blend of fiction and non-fiction. This is the story of an anonymous woman who is carrying on the ancient profession of privately entertaining rich, powerful businessmen/politicians. One could easily imagine all that she encounters at work, yet we know she is bound by a code of conduct that prohibits her from disclosing what she sees & hears. On the other hand, I am eager to learn more about the facts behind her profession and the tradition. Why the white makeup and red lips? What was her training like? What is the average age of a geisha? What is the psychology behind this profession (from the perspective of the performers and the clients).

Please let me know how you spent our second week of our "People Pictures" exercises! Tell me where you found inspirations and what you've learned about looking at pictures critically. If you'd like to see what else inspires me, feel free to follow me on Pinterest.

Please also check out these photographers and read about their experiences with this week's exercise:


Abbey Road Designs -- http://abbeyroaddesigns.blogspot.com/
Claudia Muir Photography -- http://claudiamuirphotography.com/blog/
GSG Photography -- http://gsgphotography.wordpress.com/
Elaine Janet Photography– http://elainejanet.com/
What Eyes See Daily -- http://whateyesseedaily.blogspot.com
Group -- http://dc2011women.blogspot.com/


.