
title

:: me! ::
- Leslie C
- CAN'T LIVE WITHOUT: Family. Friends. Hounds. Books. The Beach. Autumn. Cameras. Computer. iPhone. The color orange. Caramel frappucino. The words "dude!" and "nice!". Oh...and world peace ;-)
follow me

pin it

30 April 2015
:: washington dc children's photographer | {first birthday} ::
A week after his Mundun Ceremony, Baby N turned one year old! He and his adoring parents celebrated with dear family and friends at the beautiful Yards Park. Here's a sneak peek of the birthday boy, after his first haircut. Still as darling as ever :-)


29 April 2015
:: washington dc children's photographer | {mundun ceremony} ::
One of the biggest advantages of living in Washington, DC is the incredibly diverse and vibrant population. A couple of weeks ago, I was invited to photograph an Indian Mundun Ceremony, in which a first haircut is given to purify and protect the baby.
Here is a sneak peek of the adorable Baby N before the haircut. Can you believe those gorgeous eyes??? Thank you S + R for inviting me to document this incredibly special moment in N's life...

Here is a sneak peek of the adorable Baby N before the haircut. Can you believe those gorgeous eyes??? Thank you S + R for inviting me to document this incredibly special moment in N's life...
25 January 2015
:: maryland wedding photographer | {J + D 's engagement party} ::

More from Jenny + Deryck's engagement party! What a fun event! Many thanks to everyone for making me feel like part of the family! Congratulations!!!
:: alexandria del ray family lifestyle photographer | {all about the heart} ::

13 November 2014
:: washington dc newborn photographer | {sweet baby O} ::
How lucky was I to cuddle with this sweet baby girl? And to work with the calmest newborn parents I've ever met? Thank you A + P, for inviting me into your home and letting me photograph your beautiful family. Next time...the furry children too


17 October 2014
:: fall mini preview | {g family} ::
I had soooo much fun with this squeeza-licious little lady! She is everything and more. There was no doubt who was in charge of the photo session :-) It also helped that her lovely parents are the nicest, happiest people in the world.

:: fall mini preview | {k+b+k+m} ::
Can you believe all the cuteness??? Here is a preview of this adorable family's Fall Mini...

:: fall mini preview | {I family} ::
The awesome I Family and their faithful terrier. Thanks, J and R for keeping me on my toes!!!

16 October 2014
:: fall mini preview | {G+A+L} ::
The best part of offering mini sessions every year is the perk of seeing my littlest clients grow up. Here is a preview of the beautiful G and her not-so-littles from our Fall Mini Session :-)

15 September 2014
:: fall mini sessions | {saturday, oct 4th} ::
OFFERED ONLY ONCE A YEAR! Come join me for a 15-minute mini photo session. Perfect for busy families on the go. Five digital images to print at your leisure or to use on holiday cards. Please email me (leslie@binkiesandnoseprin
UPDATE: Only 2 spots left as of this morning. Please email soon to reserve your spot! Many thanks!
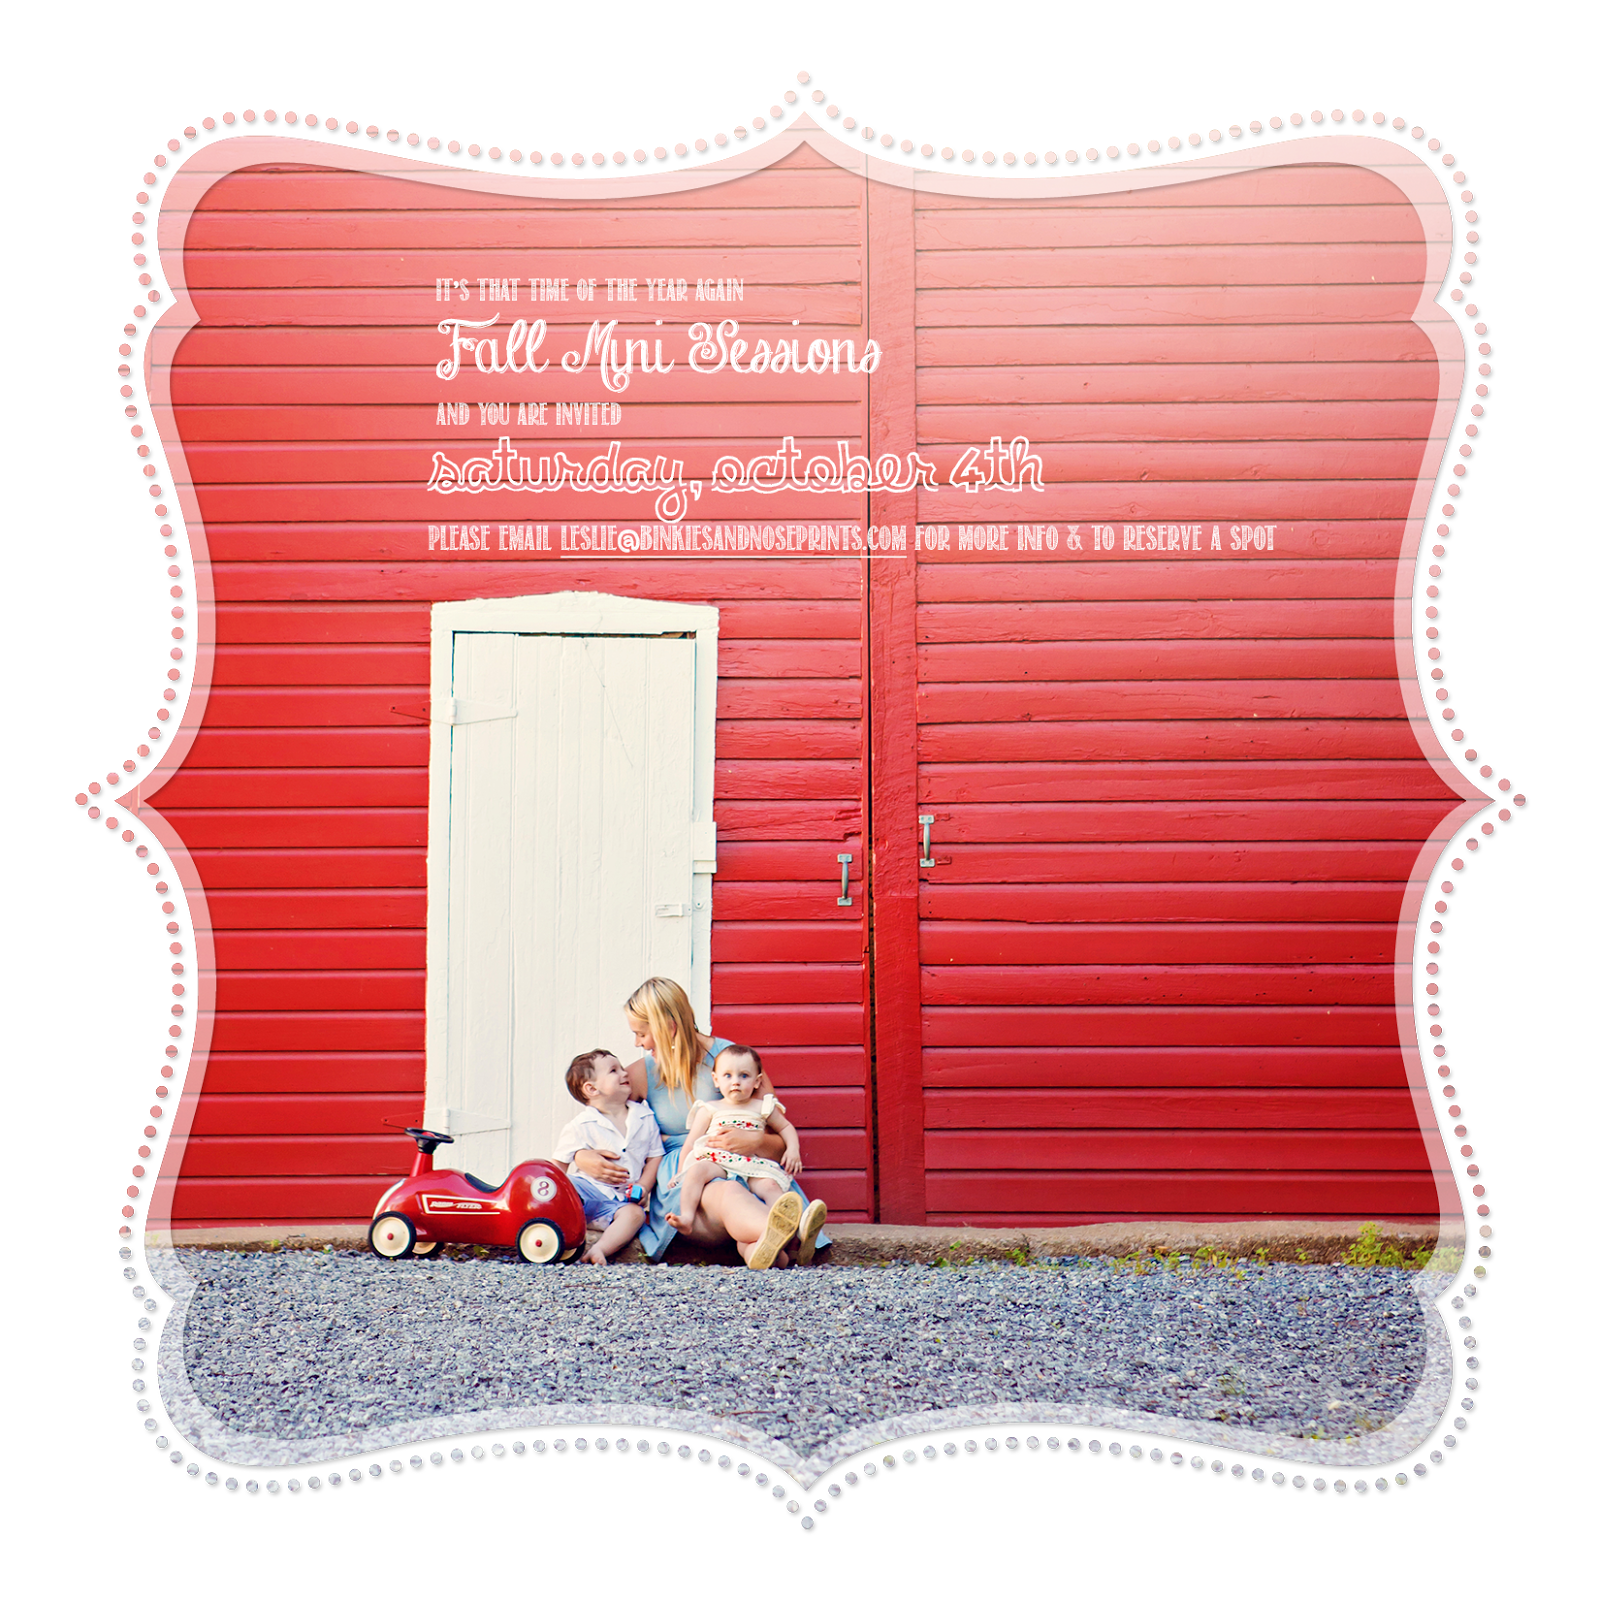
UPDATE: Only 2 spots left as of this morning. Please email soon to reserve your spot! Many thanks!
05 June 2014

03 June 2014

:: Photography Tips + Tricks : editing in Adobe Lightroom, part 3 ::
Now that I've shown you how to importing your digital images into Lightroom using the Library Module, let's go over some basics of the Develop Module. Before we get into the nitty gritty details of how to edit, we will concentrate on picking which images to edit/develop and how to create a "collection" within LR that will help you categorize those images and allow you to find them faster in the future. Remember, though, a collection is a short cut to help you find your images faster, your images will not be moved from its original place on your hard drive.
1) In the Library Module, navigate to the folder that contains the image(s) you'd like to edit.
2) Carefully survey the images, mark which ones you'd like to edit by highlighting it in the filmstrip at the bottom & hit "p" to flag it as "picked."
3) Once you have flagged your picks, click on the drop-down menu on the right, below the panel.

4) Choose "flagged" from the list & the filmstrip at the bottom will only show images that you've picked.
5) Switch to the Develop Module in the panel to the right.
6) In the panel to the left, click on the drop-down menu "Collections."
7) Click on the "+" sign. A pop-up box appears.
8) In the pop-up, select "create collection set" to set up different categories for organizing your images. I set up three major collections -- CLIENTS, FRIENDS, PERSONAL -- in order to separate my work images from my personal images.
9) Once you've created the collection sets according to your preferences, select/highlight all of the flagged images from the filmstrip.
10) Click on the "+" sign again and choose "create collection."

11) In the dialog box, give the new collection a name. Under "location", click "Inside a Collection Set" and choose the Set under which you'd like to categorize your images. Click "Create."
12) LR will automatically categorize all highlighted images into the new Collection.
13) To add more images to an existing Collection, right-click on the collection that you'd like to amend, choose "Set as Target Collection." You should see a "+" sign next to the collection if you've done it correctly.
14) Highlight the image you'd like to add to the collection, right-click & choose "Add to Target Collection."
15) Now, you are ready to edit the your images!
1) In the Library Module, navigate to the folder that contains the image(s) you'd like to edit.
2) Carefully survey the images, mark which ones you'd like to edit by highlighting it in the filmstrip at the bottom & hit "p" to flag it as "picked."
4) Choose "flagged" from the list & the filmstrip at the bottom will only show images that you've picked.
5) Switch to the Develop Module in the panel to the right.
6) In the panel to the left, click on the drop-down menu "Collections."
7) Click on the "+" sign. A pop-up box appears.
8) In the pop-up, select "create collection set" to set up different categories for organizing your images. I set up three major collections -- CLIENTS, FRIENDS, PERSONAL -- in order to separate my work images from my personal images.
9) Once you've created the collection sets according to your preferences, select/highlight all of the flagged images from the filmstrip.
10) Click on the "+" sign again and choose "create collection."
11) In the dialog box, give the new collection a name. Under "location", click "Inside a Collection Set" and choose the Set under which you'd like to categorize your images. Click "Create."
12) LR will automatically categorize all highlighted images into the new Collection.
13) To add more images to an existing Collection, right-click on the collection that you'd like to amend, choose "Set as Target Collection." You should see a "+" sign next to the collection if you've done it correctly.
14) Highlight the image you'd like to add to the collection, right-click & choose "Add to Target Collection."
15) Now, you are ready to edit the your images!
02 June 2014

28 May 2014

27 May 2014
26 May 2014

23 May 2014

22 May 2014

20 May 2014
:: Photography Tips + Tricks: editing in Adobe Lightroom, part 2 ::
Happy Tips + Tricks Tuesday!!! Last week, I talked about the benefits of using Lightroom to edit your digital images. This week, I'd like to show you how I import my images into LR from my memory card. Of course, these suggestions are part of my workflow; others may do things differently according to their workflow preferences.
Importing your images from the camera/memory card into your computer is the one single most important step of the LR editing process. How you organize your files on your hard drive will determine the success of your overall workflow. Be rigorous. Be consistent. Most people organize their images by the date, one folder for each month of the year (April 2014, for instance).
*IMPORTANT: Once you've imported the files into your computer using LR, changing the names of your files, changing file structure or moving the folders around on your hard drive could be potentially disastrous, since LR won't be able to find the original files. You'll end up spending hours on remapping and relocating the files in LR.*
1) To maximize the capabilities of LR, try shooting in the RAW format, instead of JPEG. Most DSLRs and some Point-N-Shoots offer RAW. The RAW format takes up more room on your hard drive, but you will have more editing options in LR.
2) Once you've opened up LR, you will be in the "Library" module by default if this is the first time you're using LR. If not, click on the "Library" tab at the upper right of your screen. Your latest edits will be on the screen by default.

3) Click on the "Import..." button at the bottom left of your screen. The import window will pop up.

4) To import files that are already on your hard drive, set the import mode at the top of the window to "Add" so you could add a file to the LR catalog, without creating another copy of it on your hard drive.
5) To import files from your camera or memory card, set the import mode to "Copy" so the files are copied onto your hard drive and added to the LR catalog. The original files stay on the camera or memory card.
6) I do not suggest using the "Move" mode because your files are moved, not copied, from one location (camera, memory card or hard drive) to another. Essentially, the file is deleted from its original location and relocated to the new location in one step. It always makes me nervous to have just one copy of anything. It's always safer to make sure that the copy has arrived at its new location before deleting the original.
7) Choose the source FROM which to import in the source panel on the left (camera, memory card or hard drive). Choose the destination TO which the files are imported in the destination panel on the right (usually "My Catalog"/hard drive).
8) Highlight the folder(s) in the source panel which you'd like to import. Check "New Photos" to import only photos that have not been imported previously.
9) Click "Import" in the lower right of the destination panel.
10) Once the import process is done, go to the Folders panel on the left -- navigate to & highlight the folder that you've just imported.
11) The unedited images will appear as a "film-strip" thumbnails at the bottom the screen. Depending on your setting, the center of the screen will either be a grid of previews or a single enlarged preview. If your setting is on grid, prepare for editing by clicking on a specific thumbnail image within the grid to enlarge it to a single preview.

You are now ready for editing! Check back next week for some basics on how to use the Develop Panel.
* * *
Importing your images from the camera/memory card into your computer is the one single most important step of the LR editing process. How you organize your files on your hard drive will determine the success of your overall workflow. Be rigorous. Be consistent. Most people organize their images by the date, one folder for each month of the year (April 2014, for instance).
*IMPORTANT: Once you've imported the files into your computer using LR, changing the names of your files, changing file structure or moving the folders around on your hard drive could be potentially disastrous, since LR won't be able to find the original files. You'll end up spending hours on remapping and relocating the files in LR.*
1) To maximize the capabilities of LR, try shooting in the RAW format, instead of JPEG. Most DSLRs and some Point-N-Shoots offer RAW. The RAW format takes up more room on your hard drive, but you will have more editing options in LR.
2) Once you've opened up LR, you will be in the "Library" module by default if this is the first time you're using LR. If not, click on the "Library" tab at the upper right of your screen. Your latest edits will be on the screen by default.
3) Click on the "Import..." button at the bottom left of your screen. The import window will pop up.
4) To import files that are already on your hard drive, set the import mode at the top of the window to "Add" so you could add a file to the LR catalog, without creating another copy of it on your hard drive.
5) To import files from your camera or memory card, set the import mode to "Copy" so the files are copied onto your hard drive and added to the LR catalog. The original files stay on the camera or memory card.
6) I do not suggest using the "Move" mode because your files are moved, not copied, from one location (camera, memory card or hard drive) to another. Essentially, the file is deleted from its original location and relocated to the new location in one step. It always makes me nervous to have just one copy of anything. It's always safer to make sure that the copy has arrived at its new location before deleting the original.
7) Choose the source FROM which to import in the source panel on the left (camera, memory card or hard drive). Choose the destination TO which the files are imported in the destination panel on the right (usually "My Catalog"/hard drive).
8) Highlight the folder(s) in the source panel which you'd like to import. Check "New Photos" to import only photos that have not been imported previously.
9) Click "Import" in the lower right of the destination panel.
10) Once the import process is done, go to the Folders panel on the left -- navigate to & highlight the folder that you've just imported.
11) The unedited images will appear as a "film-strip" thumbnails at the bottom the screen. Depending on your setting, the center of the screen will either be a grid of previews or a single enlarged preview. If your setting is on grid, prepare for editing by clicking on a specific thumbnail image within the grid to enlarge it to a single preview.
You are now ready for editing! Check back next week for some basics on how to use the Develop Panel.
Subscribe to:
Posts (Atom)