
title

:: me! ::
- Leslie C
- CAN'T LIVE WITHOUT: Family. Friends. Hounds. Books. The Beach. Autumn. Cameras. Computer. iPhone. The color orange. Caramel frappucino. The words "dude!" and "nice!". Oh...and world peace ;-)
follow me
pin it

25 December 2013
:: merry merry ::
Merry Christmas, everyone! Wishing you the happiest of holidays with your loved ones...
24 December 2013
:: 'till next time ::
Our Elf on the Shelf, Sparkle, has seen and heard much these past couple of weeks. Now it is time for her to head back to Santa and enjoy a well-deserved break. See you next year, Sparkle, we will miss you!

15 December 2013
:: Project Life 12.15.13 | {challenge} ::
With tons of year-end happenings, I've neglected to post here. So, to keep me photographically motivated this holiday season, I am challenging myself by taking portraits of *Sparkle*. Yep. She's our beloved Elf on the Shelf.
Nothing crazy and mischievous -- just some pretty portraits of the Lady in Red. Here she is, "letting it rip" with Beyblades:
Nothing crazy and mischievous -- just some pretty portraits of the Lady in Red. Here she is, "letting it rip" with Beyblades:
 |
| ISO 1600 | 50mm prime | f/1.2 | 1/100 sec |
20 November 2013
:: D the Great | washington dc children's photographer ::
I’m gonna walk a hundred miles,
I’m gonna whistle all the while,
If that’s what it takes to make me smile,
I’m gonna walk a hundred miles.
I’m gonna rend right up this hill,
Summer sky or winter chill,
If I gotta take a break I will,
But I wanna rend right up this hill.
I wanna hold the whole wide world
Right here in my open hands,
And maybe I’m just a little girl,
A little girl with great big plans.

I’m gonna go and take a chance,
I’m gonna learn to ballet dance,
Learn a little something about romance,
I’m gonna go and take a chance.
I’m gonna live a crazy dream,
Impossible as it may seem,
Doesn’t matter what the future brings,
I’m gonna live a crazy dream.
I wanna hold the whole wide world,
Right here in my open hands,
And maybe I’m just a little girl,
A little girl with great big plans.
~"Whole Wide World" by Mindy Gledhill
19 November 2013
:: Photography Tips + Tricks : the trifecta of shooting in manual mode ::
It dawned on me last night that I didn't keep my promise to talk about how to shoot in Manual mode! Although I hope you found last week's tips + tricks on ordering photo cards helpful ;-)
This is the setting that I lock down FIRST when I shoot. I'm a sucker for a creamy, blurry background. I think it highlights my subjects rather well. My lens is usually set between F/1.2 to F/2.8 for this purpose. However, sometimes you may want to rely on the background to help you tell the story. In that case, you could dial up the F-stop to F/4.0 or F/5.6 for a single subject, or up to F/8.0 for a large group of people. Remember:
Once I set my Aperture value, I then try to understand how much light and the type of light I am dealing with, so that I could set my ISO to a specific value and leave it there. For instance, if I am in full sun with tons of brilliant fall light, I would opt to set my ISO at 200, or even 100 for less sensitivity and more color. If I am in open shade or cloudy condition, I would set my ISO at 200 or 400 for more sensitivity. If I am indoors with limited natural light, I would set my ISO at 800 or above for the most sensitivity. EXCEPTION: if you have a lens that will allow you to shoot wide open at F/1.4 or F/1.2, you could set your ISO lower in low-light conditions; a lower ISO will give you images less noise (dark speckles that make your images fuzzy) and better color saturation. Remember:
As I mentioned, shooting portraits in Aperture Priory mode will get you pretty awesome results with the right lens (aperture of F/2.8 or lower). However, shooting in Manual mode allows you to customize your photographic "look", which in turn helps you tell your story by strengthening your point of view. For instance, if you like airy, light, ethereal images, you would probably set your exposure slightly higher (overexpose) than what the camera's meter tells you. On the other hand, if you like dense, dark, moody images, you would probably set your exposure slightly lower (underexpose).
Remember, exposure comprises of three major elements that I'd like to call the Trifecta of Exposure: Aperture, ISO and Shutter Speed. While the Trifecta operate in different ways, their shared primary function is to regulate how much light enters through the lens and into the camera.
When I'm doing an onsite shoot with younger children, it is nearly impossible to adjust my camera settings for every single shot. So instead, I survey the environment and the conditions around me and ask myself these questions. By answering these questions (in sequence), I could then make educated guesses on how to adjust my camera settings for a particular situation:
Is the background distracting or complements the story that I'm trying to capture? How blurry do I want the background?
This is the setting that I lock down FIRST when I shoot. I'm a sucker for a creamy, blurry background. I think it highlights my subjects rather well. My lens is usually set between F/1.2 to F/2.8 for this purpose. However, sometimes you may want to rely on the background to help you tell the story. In that case, you could dial up the F-stop to F/4.0 or F/5.6 for a single subject, or up to F/8.0 for a large group of people. Remember:
Low F-stop --> wider aperture --> more light into sensor and shallower depth of field (DOF) --> more exposure and blurrier background
How much light do we have? Are we in full sun, open shade or indoors?
Once I set my Aperture value, I then try to understand how much light and the type of light I am dealing with, so that I could set my ISO to a specific value and leave it there. For instance, if I am in full sun with tons of brilliant fall light, I would opt to set my ISO at 200, or even 100 for less sensitivity and more color. If I am in open shade or cloudy condition, I would set my ISO at 200 or 400 for more sensitivity. If I am indoors with limited natural light, I would set my ISO at 800 or above for the most sensitivity. EXCEPTION: if you have a lens that will allow you to shoot wide open at F/1.4 or F/1.2, you could set your ISO lower in low-light conditions; a lower ISO will give you images less noise (dark speckles that make your images fuzzy) and better color saturation. Remember:
Low ISO --> less sensitivity --> less light into sensor --> less noise and more colors saturation
How mobile are my subjects and how fast are they moving?
As any parent knows, taking photos of moving children can be tricky to say the least. In order to capture a moving subject and still remain sharply focused, you would need to set your shutter speed at 1/125sec at the minimum, preferably at 1/250sec or higher. At a shutter speed less than 1/60sec, you will need to use a tripod in order to avoid motion blur. If you find, at this point (with the Aperture and ISO already set), you need to dial down the shutter speed to below 1/125sec, then you could adjust the Aperture to a lower f-stop or adjust the ISO to higher sensitivity. This all depends what is more important to you -- blurry background or color saturation. Remember:
High shutter speed --> shutter open for less time --> less light --> capture faster motion
Since shutter speed is the easiest of the Trifecta to change, it's the only adjustment I make when I need to adjust exposure mid-shoot.
High shutter speed --> shutter open for less time --> less light --> capture faster motion
Since shutter speed is the easiest of the Trifecta to change, it's the only adjustment I make when I need to adjust exposure mid-shoot.
With practice, you could be shooting in Manual mode like a pro in no time!
 |
| F/2.8, ISO 400, 1/125sec --> I set the Aperture at F/2.8 because I wanted to focus on the girls and the pink balloon, while at the same time include the picnic shelter beyond to tell the story in context. It was a cloudy moment during the day, so I picked ISO 400 to avoid too much noise but still be able to capture the strong colors of the surrounding foliage. Lastly, because the girls are just sitting quietly, I was able to use a slower shutter speed and keep the subjects in sharp focus. |
13 November 2013
:: Dimples | washington dc children's photographer ::
Did I or did I not mention the dimples on Little E?!?!?!

12 November 2013
:: Photography Tips + Tricks | ordering photo holiday cards ::
With the availability of online services such as TinyPrints and Minted, it is now easier than ever to order beautiful photo holiday cards whenever you want, and wherever you want. With thousands of expertly designed cards to choose from, you could preview each design by uploading and inserting your own digital photo(s) or professional photos from your favorite photographer.
PHOTO SUBMISSION GUIDELINES
While the process seems easy enough, here are some tips + tricks to help you get the best results (as suggested by TinyPrints & Minted):
PHOTO SUBMISSION GUIDELINES
 |
| courtesy of Minted.com |
- Originals -- always upload original photos from your digital camera or from your photographer (not cropped or resized).
- Resolution -- always shoot at the highest resolution possible, and upload the highest resolution possible (but less than 25MB each).
- File format -- .jpg.gif, .png, .bmp and .tiff.
- Sharpness -- choose images that are in focus. Blurred images from poor focus and motion do not print well.
- Exposure and light -- choose images that have proper exposure and are well-lit. Dark images do not print well. Natural light is best, but preferably not in direct sunlight. If you need to use a flash, stand at least 3 feet away from intended subject. If you need some guidance, please check out my Tips + Tricks about how to find outdoor light.
- Shop early -- goes without saying, as these services become more busy closer to the holidays, and often will take longer to print and ship.
- Take advantage of free-shipping offers by shopping early.
 |
| courtesy of tiny prints.com |
PREPARATION
To ensure a timely send-off of the cards once they arrive, you could do these things in advance:
- Gather all the addresses you plan to use
- Input address into the computer as an electronic list using Excel, Word, Notes etc.
- Buy address labels from Staples, Office Depot or the Paper Source etc.
- Paper Source has some beautifully shaped labels if you want something more unique.
- Download the appropriate template(s) for the address labels.
- Copy and paste names and addresses into the label templates. Print.
- Alternatively, for a more polished look, you could stock up on printer cartridges and print directly onto the envelopes. This is more time intensive, but this is my preferred method.
- For the return address (your address), I like using a custom designed stamp from the Paper Source. There are 160+ designs to choose from. Stamp your address onto the backslap of the envelope for a clean, modern look.
- You could also order matching, pre-printed return address labels from the printing services.
I hope these tips + tricks will help you streamline the holiday card sending process and leave you more time to enjoy your holidays!
08 November 2013
:: Head Shots for SAW | washington dc head shot photographer ::
Soon, I will be saying: " I knew him when..." He's going to be a big star.

07 November 2013
:: the A boys | washington dc family lifestyle photographer ::
It is always so much fun to work with children who are playful and full of energy. These three handsome boys not only kept me on my toes, but they showed me the joy of being a kid. Sneak peek into our recent session...more to come!


06 November 2013
:: Z + H | washington dc family lifestyle photographer ::
I've had the pleasure of photographing Z + H three years in a row. They always manage to brighten my day with their beautiful, innocent smiles and gorgeous baby blues. More to come soon...in the mean time, here's a preview of this year's session:


:: Simple Steps to Spectacular Holiday Photos | Huffington Post ::
Yay! BINKIES + NOSEPRINTS {PHOTOGRAPHY} is once again featured in the Huffington Post! Check out my tips on composition, as well as other helpful advice from my fellow photographers on how to take spectacular holiday photos at home.
05 November 2013
:: Photography Tips + Tricks | {which shooting mode to use for portraits} :
After I bought my first dSLR, I read the instruction manual from cover to cover like a nerd. It was great learning about the various capabilities and limitations of the camera, but I couldn't really figure out which shooting mode(s), other than AUTO, would be better for shooting portraits. AUTO mode worked ok in settings with plenty of natural or artificial light, but when I tried shooting in low-light situations, the onboard flash would !POP! up and ruin the shot. By the way, if you don't already know this -- I despise onboard flashes. The mere swishing sound of one rearing its ugly head makes me cringe every single time.
Which mode is better for portraits then? We like the convenience that the AUTO mode offers us, but we don't like how it performs in low-light situations. We also like a creamy, blurred background that will help accentuate our subjects. So in order to shoot more effectively, setting the camera to Aperture Priority (AV in Canon or A in Nikon) mode seems like a good bet. Aperture Priority mode allows us to control the Aperture, while the camera automatically adjusts the shutter speed and ISO for proper exposure.
However, you must keep in mind that in low-light conditions, the shutter speed will often become so slow that it becomes impossible to hand hold the camera and still capture clean, sharp images (usually anything slower than 1/60 sec). In that case, you could also manually set the ISO according to your shooting condition (e.g. 200 for a bright, sunny day outdoors, or 1600+ for a dimly lit room indoors), and the camera will then only automatically adjust the shutter speed for proper exposure.
But at which aperture/f-stop value should you shoot when in AV mode? For most portraits, an aperture value of f/2.8 is more than sufficient. However, in extreme low-light conditions such as Trick-O-Treat night, you'd want to stop down the f-stop as much as possible so that the aperture is as wide open as possible. An f-stop value of 1.2 or 1.4 or 1.8, paired with a high ISO value will allow you to do marvelous things in near darkness.
Alternatively, you could also shoot at f/1.2 or 1.4 or 1.8 on a sunny day, which will allow you to set the ISO to 100 or 200 for maximum color saturation, blur out any distracting background, and capture high-speed motion at the same time. But be careful. Because the Depth of Field becomes extremely shallow at low f-stop value, focus and sharpness becomes a concern when shooting close-up portraits. If you focus on the wrong feature on the face (i.e. the nose instead of the eyes), then the nose would be sharp and in focus, while the eyes become blurry and muddy. So choose your focus point wisely; generally try to focus on the eye that is closest to the camera.
Once you've got the hang of shooting in Aperture Priority, you are only a short hop, skip and jump from shooting in full Manual mode! Next week, we will talk about how to shoot in Manual mode (it is much easier than you think) by manipulating the "Triumvirate of Exposure."
Which mode is better for portraits then? We like the convenience that the AUTO mode offers us, but we don't like how it performs in low-light situations. We also like a creamy, blurred background that will help accentuate our subjects. So in order to shoot more effectively, setting the camera to Aperture Priority (AV in Canon or A in Nikon) mode seems like a good bet. Aperture Priority mode allows us to control the Aperture, while the camera automatically adjusts the shutter speed and ISO for proper exposure.
However, you must keep in mind that in low-light conditions, the shutter speed will often become so slow that it becomes impossible to hand hold the camera and still capture clean, sharp images (usually anything slower than 1/60 sec). In that case, you could also manually set the ISO according to your shooting condition (e.g. 200 for a bright, sunny day outdoors, or 1600+ for a dimly lit room indoors), and the camera will then only automatically adjust the shutter speed for proper exposure.
But at which aperture/f-stop value should you shoot when in AV mode? For most portraits, an aperture value of f/2.8 is more than sufficient. However, in extreme low-light conditions such as Trick-O-Treat night, you'd want to stop down the f-stop as much as possible so that the aperture is as wide open as possible. An f-stop value of 1.2 or 1.4 or 1.8, paired with a high ISO value will allow you to do marvelous things in near darkness.
 |
| What my eyes saw |
 |
| What my lens saw: ISO 3200, F/1.2, 1/60 sec |
Alternatively, you could also shoot at f/1.2 or 1.4 or 1.8 on a sunny day, which will allow you to set the ISO to 100 or 200 for maximum color saturation, blur out any distracting background, and capture high-speed motion at the same time. But be careful. Because the Depth of Field becomes extremely shallow at low f-stop value, focus and sharpness becomes a concern when shooting close-up portraits. If you focus on the wrong feature on the face (i.e. the nose instead of the eyes), then the nose would be sharp and in focus, while the eyes become blurry and muddy. So choose your focus point wisely; generally try to focus on the eye that is closest to the camera.
 |
| ISO 200, F/2.8, 1/500 sec |
Once you've got the hang of shooting in Aperture Priority, you are only a short hop, skip and jump from shooting in full Manual mode! Next week, we will talk about how to shoot in Manual mode (it is much easier than you think) by manipulating the "Triumvirate of Exposure."
04 November 2013
:: Little D | washington dc family lifestyle photographer ::

...and here she is, at six months of age, cute as a button and with the most squishable cheeks ever!

31 October 2013
:: P Family | Washington DC Family Lifestyle Photographer ::
Sometimes, the 'in-between' moments during a photo shoot are the most beautiful...this is just a preview of more to come!


30 October 2013
:: Little E | Washington DC Family Lifestyle Photographer ::
Remember this little guy? I met and photographed him just days after his dads brought him home.

We were reunited this past weekend during a holiday mini session. He wasn't so sure about the stranger lady with the big camera, but I managed to capture some beautiful shots of E and his dads. Here's a preview I just had to share:

Check back tomorrow for more sneak peeks from the Holiday Minis!

We were reunited this past weekend during a holiday mini session. He wasn't so sure about the stranger lady with the big camera, but I managed to capture some beautiful shots of E and his dads. Here's a preview I just had to share:

Check back tomorrow for more sneak peeks from the Holiday Minis!
29 October 2013
:: Photography Tips + Tricks : getting down and dirty ::
Good Tuesday morning! Not only is this my favorite time of the year, I am still riding on the high from this past weekend's Holiday Minis. It is always sooo nice to catch up with my photography family and play with the Little Ones -- some of whom I photographed for a third year in a row.
While furiously editing the mini sessions, I thought I'd take a break and share a simple tip with you that could help you take better photos of your Little Ones at home.
The most common mistake I see parents make is shooting from the perspective of an adult. Most parents shoot from the standing position down towards the level of the child. The result is a photo that is slightly distorted and probably not very well composed. Instead, try shooting at the level of the child; bend those rickety old knees (I have them as well), and lower your body and the camera to the eye-level of the child you are shooting. You will see that a seemingly mundane background all of a sudden becomes something bigger and more magical -- more like how your child sees the world around her/him. The background is now the supporting element that helps you tell a story.
There is one exception however. When you are taking a close-up shot of your child's face, it is ok to shoot from way above the child's level -- i.e. have the child sitting on the ground, looking up straight into the camera as you stand over his/her shoulder. This technique will allow you to fill the frame with his/her beautiful face without a lot of distracting background.

I hope you find this week's Tips + Tricks helpful. Check back next week for more Photography Tips + Tricks!
While furiously editing the mini sessions, I thought I'd take a break and share a simple tip with you that could help you take better photos of your Little Ones at home.
The most common mistake I see parents make is shooting from the perspective of an adult. Most parents shoot from the standing position down towards the level of the child. The result is a photo that is slightly distorted and probably not very well composed. Instead, try shooting at the level of the child; bend those rickety old knees (I have them as well), and lower your body and the camera to the eye-level of the child you are shooting. You will see that a seemingly mundane background all of a sudden becomes something bigger and more magical -- more like how your child sees the world around her/him. The background is now the supporting element that helps you tell a story.
 |
| Lower the camera to the eye level of your child so that you could tell the story from the child's point of view. |
There is one exception however. When you are taking a close-up shot of your child's face, it is ok to shoot from way above the child's level -- i.e. have the child sitting on the ground, looking up straight into the camera as you stand over his/her shoulder. This technique will allow you to fill the frame with his/her beautiful face without a lot of distracting background.

I hope you find this week's Tips + Tricks helpful. Check back next week for more Photography Tips + Tricks!
23 October 2013
:: Photography Tips + Tricks: finding the light outdoors ::
I am a natural-light photographer. Meaning, I don't use artificial lighting (flash or external light source) when shooting. Instead, I rely on my low-aperture lenses and the ability to find light. Light is everywhere. Light is all around us. It just takes some patience and a lot of practice to harness its magic. It is entirely possible to shoot indoors using natural light as well, but for now we will concentrate on outdoor natural light and talk more in-depth about indoor natural light in the near future.
When possible, I try to schedule shoots early in the morning or late in the afternoon in order to shoot in the most flattering natural light possible. During these times, the sun is low in the sky, casting a warm, dewey glow on everything. Your subjects will appear flawless and almost other-worldly. There is a inherent quietness in portraits taken during these times that make them timeless and extraordinary.
Before I picked up my first dSLR and learned the tricks of the trade, I loooved shooting in full sun in the middle of the day. I thought: "I'm getting beautifully saturated colors and everything looks happy and bright." Now I think: "Ugh, this sun is too bright, my subjects are going to look like Dracula, with intense, black shadows all over their faces." The truth is, shooting in full sun that is high in the sky does give your photos the best color vibrance and saturation. This is because in bright light, you can set your ISO very low (200 or even 100 on a crisp autumn day), which will give you the best possible color saturation. However, on the flip side, you now have an intense light that highlights every flaw, increases contrast, and casts horribly unflattering shadows.
Instead, try shooting INTO the sun, with the back of your subject to the sun -- hence the term backlighting. Backlighting can be tricky, but by keeping a few tricks in mind, you could achieve a beautifully colorful look without all the negatives. First, meter to the skin on your subject's cheek. Then adjust your settings for proper exposure. I'd recommend setting your ISO at 200 or 400, setting the f-stop at 2.8 or 4.0 for a creamy background bokeh, and a very fast shutter speed to compensate for the low ISO and f-stop values. Sometimes, when you shoot into the sun, you will get a dreamy, hazy look across the image. Most people love this look; but if you like a cleaner, sharper look, shoot into the sun, but make sure that the sun itself is actually not in the frame.
CLOUDY / OPEN SHADE = EVEN LIGHTING W/O SHADOWS
Believe it or not, a cloud-covered day is a natural-light photographer's friend. A cloudy day allows you to shoot outdoors in the middle of the day without harsh shadows. The light filters through the clouds and is distributed evenly across the environment. If you have to shoot outdoors in the middle of the day, a cloudy sky could be your friend. On the other hand, if you are shooting on an extremely sunny day, look for shady areas that are completely in shade (full open shade) -- meaning, no dappled spots of sunlight filtering through leaves that could cast strange shadows onto your subjects. Preferably, your shady spot is surrounded by light-colored walls or cover that will act as reflectors that will bounce even, natural light onto your subjects. If your shady spot is under a tree, make sure you meter to the skin on your subject's cheek and expose accordingly; also, make sure you compensate during processing/editing for any green tint that may be casted onto your subject's skin from the trees/grass. Another issue to be aware of is: there may not be as much contrast as you'd like between your subject and the background, something easily fixable during processing/editing.
All of the above images were taken on-location, during a scouting trip to this year's mini session venue. We have a jam-packed day waiting for us this Saturday. I can't wait!!! If you cannot make it this Saturday and would like to take advantage of the Holiday Minis, please email me so that I could put you on a list for a possible second Holiday Mini date.
* * *
MAGIC HOURS = WARM, DEWEY GLOW
 |
| Photo shot early in the morning, when the sun was very low in the cloudless sky. ISO 400, 50mm, f/2.8, 1/4000 sec. |
When possible, I try to schedule shoots early in the morning or late in the afternoon in order to shoot in the most flattering natural light possible. During these times, the sun is low in the sky, casting a warm, dewey glow on everything. Your subjects will appear flawless and almost other-worldly. There is a inherent quietness in portraits taken during these times that make them timeless and extraordinary.
* * *
FULL SUN = BACKLIGHTING
 |
| Photo shot around 10:30AM in full sun. ISO 200, 50mm, f/2.8, 1/2000 sec. |
Before I picked up my first dSLR and learned the tricks of the trade, I loooved shooting in full sun in the middle of the day. I thought: "I'm getting beautifully saturated colors and everything looks happy and bright." Now I think: "Ugh, this sun is too bright, my subjects are going to look like Dracula, with intense, black shadows all over their faces." The truth is, shooting in full sun that is high in the sky does give your photos the best color vibrance and saturation. This is because in bright light, you can set your ISO very low (200 or even 100 on a crisp autumn day), which will give you the best possible color saturation. However, on the flip side, you now have an intense light that highlights every flaw, increases contrast, and casts horribly unflattering shadows.
Instead, try shooting INTO the sun, with the back of your subject to the sun -- hence the term backlighting. Backlighting can be tricky, but by keeping a few tricks in mind, you could achieve a beautifully colorful look without all the negatives. First, meter to the skin on your subject's cheek. Then adjust your settings for proper exposure. I'd recommend setting your ISO at 200 or 400, setting the f-stop at 2.8 or 4.0 for a creamy background bokeh, and a very fast shutter speed to compensate for the low ISO and f-stop values. Sometimes, when you shoot into the sun, you will get a dreamy, hazy look across the image. Most people love this look; but if you like a cleaner, sharper look, shoot into the sun, but make sure that the sun itself is actually not in the frame.
* * *
CLOUDY / OPEN SHADE = EVEN LIGHTING W/O SHADOWS
 |
| Photo shot around 10:30 AM in full, open shade. ISO 400, 50mm, f/2.8, 1/200 sec. |
Believe it or not, a cloud-covered day is a natural-light photographer's friend. A cloudy day allows you to shoot outdoors in the middle of the day without harsh shadows. The light filters through the clouds and is distributed evenly across the environment. If you have to shoot outdoors in the middle of the day, a cloudy sky could be your friend. On the other hand, if you are shooting on an extremely sunny day, look for shady areas that are completely in shade (full open shade) -- meaning, no dappled spots of sunlight filtering through leaves that could cast strange shadows onto your subjects. Preferably, your shady spot is surrounded by light-colored walls or cover that will act as reflectors that will bounce even, natural light onto your subjects. If your shady spot is under a tree, make sure you meter to the skin on your subject's cheek and expose accordingly; also, make sure you compensate during processing/editing for any green tint that may be casted onto your subject's skin from the trees/grass. Another issue to be aware of is: there may not be as much contrast as you'd like between your subject and the background, something easily fixable during processing/editing.
All of the above images were taken on-location, during a scouting trip to this year's mini session venue. We have a jam-packed day waiting for us this Saturday. I can't wait!!! If you cannot make it this Saturday and would like to take advantage of the Holiday Minis, please email me so that I could put you on a list for a possible second Holiday Mini date.
22 October 2013
:: Project Life 10.22.13 | {natural} ::
I must've caught the bug that my kids have had for the last two weeks. Signing out to get some rest. Please check back tomorrow for my latest Photography Tips + Tricks: finding the light. Be well...


21 October 2013

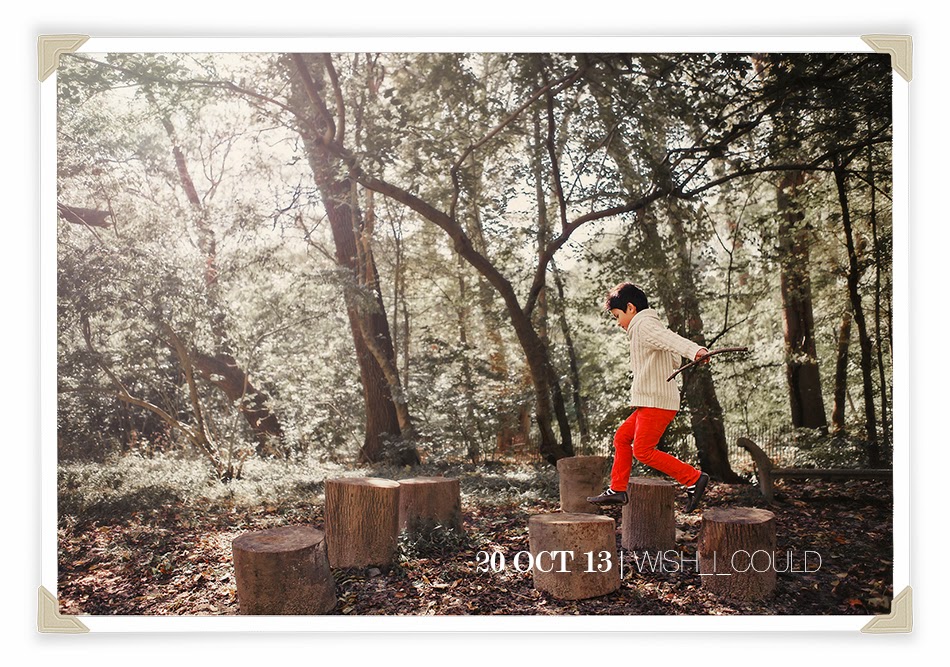
20 October 2013
:: Project Life 10.20.13 | {wish i could} ::
15 October 2013
:: Photography Tips + Tricks: how to take great holiday card photos ::
Greetings! As we draw closer to the Holiday Season, it is time to start thinking about personalizing holiday greetings with beautiful photos. Taking holiday photos of your family can be a lot of fun. Here are some Tips + Tricks that I use that will hopefully help the process go more smoothly.
Tip #1: Be Organized
Plan ahead by writing a list of what you will need to bring to the shoot -- camera, extra batteries, extra memory cards, props (e.g. cute knitted hats, beautiful holiday togs, special holiday decorations, lovely woolen blankets), healthy snacks and drinks for you and the little ones. After the shoot, you could use the same list to make sure everything you brought is also going home with you.
Tip #2: Know Your Kids
No one knows your kids better than you. Pick a time of the day that is best for everyone -- a time when everyone is well-fed and rested. Also, put your children at ease by engaging them in conversations and activities in which they will be interested. Play with them! Have fun! Genuinely happy kids = genuinely happy photos.
Tip #3: Un-Pose Your Family
Have you noticed that the most genuine and most emotive images are usually those that look unplanned/unposed? Hugging, kissing, tickling, jumping, running, playing...let your kids do the work. Just make sure your shutter speed is set on sonic speed (or at least 1/250 sec) to keep up with all the action.
Tip #4: Compose Your Shots
Remember my Tips + Tricks on composition? The Rule of Thirds? The Camera Tilt? Foreground, Middleground, Background? Apply these tools for visually interesting and compositionally strong group and individual images. In addition, make sure everyone in a group photo is "squished in" as tightly as possible -- try to leave as little spaces as possible between the subjects. When possible, arrange everyone in a triangular composition, with the highest point of the triangle in the middle of the composition. For individual images, try to get in close and Fill the Frame (another handy compositional tool) with the gorgeous faces of your little ones. Lastly, if you plan on inserting your images into a pre-designed card from vendors such as Tiny Prints or Minted, make sure you take photos in both the portrait/vertical orientation as well as the landscape/horizontal orientation, and/or compose your shots such that they could be inserted into vertical or horizontal or square slots in the card design.
Tip #5: Include Yourself in the Photos
Generally when I'm shooting a family, I try to get at least one really good group photo, one really good individual photo of each child, one really good photo of the parents together and one really good photo of each parent with each child. Use the camera self-timer to include yourself in the photos. Or hand the camera over to your spouse so that he/she could capture some photos of you with each of your children. Your children will appreciate these images immensely later.

On the other hand, if you'd rather enlist the help of a professional photographer, please email or call me for more info on our Mini Photo Session. The response this year has been wonderful, so I am hoping to add a second day of Mini Photo Sessions for those who are not able to book a slot for Saturday, October 26th. Please contact me ASAP if you'd like to be added to the list.
My apologies for not posting any Tip or Trick last week. With a household full of school-aged children, I always have to be at the ready to deal with any ailment that may come our way this time of the year :-)
Tip #1: Be Organized
Plan ahead by writing a list of what you will need to bring to the shoot -- camera, extra batteries, extra memory cards, props (e.g. cute knitted hats, beautiful holiday togs, special holiday decorations, lovely woolen blankets), healthy snacks and drinks for you and the little ones. After the shoot, you could use the same list to make sure everything you brought is also going home with you.
Tip #2: Know Your Kids
No one knows your kids better than you. Pick a time of the day that is best for everyone -- a time when everyone is well-fed and rested. Also, put your children at ease by engaging them in conversations and activities in which they will be interested. Play with them! Have fun! Genuinely happy kids = genuinely happy photos.
Tip #3: Un-Pose Your Family
Have you noticed that the most genuine and most emotive images are usually those that look unplanned/unposed? Hugging, kissing, tickling, jumping, running, playing...let your kids do the work. Just make sure your shutter speed is set on sonic speed (or at least 1/250 sec) to keep up with all the action.
Tip #4: Compose Your Shots
Remember my Tips + Tricks on composition? The Rule of Thirds? The Camera Tilt? Foreground, Middleground, Background? Apply these tools for visually interesting and compositionally strong group and individual images. In addition, make sure everyone in a group photo is "squished in" as tightly as possible -- try to leave as little spaces as possible between the subjects. When possible, arrange everyone in a triangular composition, with the highest point of the triangle in the middle of the composition. For individual images, try to get in close and Fill the Frame (another handy compositional tool) with the gorgeous faces of your little ones. Lastly, if you plan on inserting your images into a pre-designed card from vendors such as Tiny Prints or Minted, make sure you take photos in both the portrait/vertical orientation as well as the landscape/horizontal orientation, and/or compose your shots such that they could be inserted into vertical or horizontal or square slots in the card design.
Tip #5: Include Yourself in the Photos
Generally when I'm shooting a family, I try to get at least one really good group photo, one really good individual photo of each child, one really good photo of the parents together and one really good photo of each parent with each child. Use the camera self-timer to include yourself in the photos. Or hand the camera over to your spouse so that he/she could capture some photos of you with each of your children. Your children will appreciate these images immensely later.
* * *
On the other hand, if you'd rather enlist the help of a professional photographer, please email or call me for more info on our Mini Photo Session. The response this year has been wonderful, so I am hoping to add a second day of Mini Photo Sessions for those who are not able to book a slot for Saturday, October 26th. Please contact me ASAP if you'd like to be added to the list.
* * *
My apologies for not posting any Tip or Trick last week. With a household full of school-aged children, I always have to be at the ready to deal with any ailment that may come our way this time of the year :-)
07 October 2013

06 October 2013

02 October 2013
:: Project Life 10.02.13 | {sunset} ::
Obviously, this photo was taken over the summer...but I just had to share the unbridled joy on her face...

01 October 2013
:: Photography Tips + Tricks: choosing a dSLR lens | part two ::
Happy Tuesday! I am sooo enjoying this glorious autumn weather. Perfect weather for the Holiday Mini Photo Sessions! Please email me for more information and to book a spot. Limited spots available. Reserve your session now!
Canon offers three versions of the 50mm: the f/1.8, f/1.4 and f/1.2L. If you currently do not own a 50mm, start off with the f/1.8, which costs less than $150.00. If you fall in love with the f/1.8 but feel like you may want to upgrade to the f/1.4 or f/1.2, you always have the option of selling the old lens on sites such as eBay or craigslist.org. Try not to do a trade-in at your local camera shop if you could help it -- you will not get a very good trade-in value, as compared to selling the lens online. Likewise, be on the lookout for good deals on used/refurbished equipment on eBay and craigslist.org. Be sure to ask the seller why they are selling it though. Sometimes the item may not be in great working condition; make sure you check out the mechanisms and auto focus by mounting it onto your camera body to make sure it takes sharp photos in different conditions.
Last week, I outlined some basics of dSLR lenses. This week, let's get down to the specifics! Again, your aesthetic and shooting style will help you determine which lens(s) is best suited for your needs. Of course, these are MY suggestions; they are in no way the gospel ;-)
First, perhaps it'd be helpful to tell you what I have in my camera bag:
- Canon 5D Mark ii camera body
- Canon 50mm f/1.2L prime lens (normal focal length)
- Canon 24-70mm f/2.8L zoom lens (wide to telephoto FL)
- Canon 24-105mm f/4.0L IS zoom lens (wide to telephoto FL; IS = image stability)
- Canon 70-200mm f/2.8L zoom lens (telephoto FL)
Mind you, I rarely carry all of this equipment to my on-location shoots. As I became more comfortable with my shooting style and workflow, I figured out which lenses will give me the best results. Since I shoot mostly portraits and lifestyle images, I chose lenses that could give me beautifully blurred backgrounds as well as responsiveness in low-light situations -- lenses that have f/stop values (wideness/openness of the aperture) of at least f/2.8.
My favorite lens of ALL TIME is the 50mm. The "Nifty-Fifty", as the 50mm is lovingly called, is a must-have. It allows me to shoot in low-light and/or indoors without a tripod or flash, while giving me the dreamy, creamy blurred background that I love. HOWEVER, remember that if your camera has a crop-sensor (beginner/semi-pro models) rather than a full-frame sensor (pro models), the 50mm will in fact act more like a 85mm in terms of angle of view and magnification. Some photographers also like the 85mm prime lens for portraits. The 85mm is great for capturing details (close-ups of eyelashes, ears, little hands and feet), as it could work a lot like a macro lens.
 |
| All shot indoors, in low light, on the Canon 5D Mark ii with the Cannon 50mm f/1.2L lens: ISO 1600, f/1.2, 1/125sec |
The other lens that I carry with me to all of my shoots is the 24-70mm f/2.8 zoom lens. This is the lens that stays on my camera most of the time for both business and pleasure. I love the range of focal lengths and the aperture is wide enough that I could shoot in low-light in a pinch, provided I bump up the ISO or lower the shutter speed. If you prefer to own just ONE versatile, all-around lens, instead of an arsenal of different lenses, a zoom lens with a low f-stop value is the way to go.
There isn't really another Canon lens that is equivalent to the f/2.8L, but Sigma makes a Canon-compatible lens that has received great reviews. The Sigma 17-50mm f/2.8 on a crop-sensor camera, will effectively match the magnifications of the 24-70mm on a full-frame camera. At less than $570.00, it is a great investment that will allow you a lot of flexibility and make your shooting easier and more enjoyable.
 |
| Canon 5D Mark ii with the Canon 24-70mm f/2.8L lens: 45mm, f/2.8, 1/4000sec |
There isn't really another Canon lens that is equivalent to the f/2.8L, but Sigma makes a Canon-compatible lens that has received great reviews. The Sigma 17-50mm f/2.8 on a crop-sensor camera, will effectively match the magnifications of the 24-70mm on a full-frame camera. At less than $570.00, it is a great investment that will allow you a lot of flexibility and make your shooting easier and more enjoyable.
For those who do not mind a higher f/stop value, a zoom lens with f/stop value of f/4 would work almost as well if it has an Image Stabilizing mechanism of some sort. Remember, in low-light conditions, a higher f/stop value requires slower shutter speeds to allow the same amount the light to hit the sensor, as compared to a lower f/stop value. The IS feature will allow you to slow down your shutter speed to more than 1/60 (1/40, for example), while minimizing blurring due to camera shake. While the 24-105 f/4L IS does not have a low f/stop value, I still use it occasionally because it gives me very sharp images with nice, clean colors, even in low light conditions.
For the aspiring paparazzi, or mamarazzi for that matter, the 70-200mm f/2.8 might be exactly what you need. However, to be honest, I use the lens only occasionally for weddings and engagement sessions. Without a tripod or IS mechanism, the 70-200mm lens's hefty weight causes more camera/hand shake blurriness because it is HEAVY. Also, the Canon version is relatively expensive, although a similar lens by Tamron costs about 1/3 less. If I had to make a choice, I'd choose the Sigma 17-50mm over the 70-200mm any day.
If you're a careful shopper and would like to try out the lenses before you make the investment, services such as Borrow Lenses lets you do just that. You could even rent lenses for special occasions -- such as births, birthdays or weddings -- and benefit from the pro quality equipment at a fraction of the cost.
As always, if you'd rather have some one-on-one time with me, you are always welcome to contact me to schedule a private lesson.
Have a wonderful day!
25 September 2013
:: Holiday 2013 Mini Photo Sessions ::
Yes! Believe it or not, it is time for the B+N {PHOTOGRAPHY} HOLIDAY MINI PHOTO SESSIONS again! I get very excited this time every year not only because everything is the color of orange, but also because I get to catch up with repeat clients (and see how much their little ones have grown over the year) and meet new families.

This year, there will be TWO MINI OPTIONS to choose from!
1) POSH MINI | $ 500.00 (offered year-round by appointment)
30-min shoot | private online gallery | 10 digital favorites
2) HOLIDAY MINI | $ 250.00 (offered only once in the Fall)
15-min shoot | private online gallery | 5 digital favorites
The Mini Photo Session is a great option for families with young children and busy families on the go. Believe it or not, we could capture some beautiful, stress-free images in just 15-30 minutes. The fully-retouched hi-res digital favorites would be perfect to use in your 2013 holiday cards, or in holiday photo books as gifts to family & friends.

WHEN: Saturday, October 26th | 9:00AM - 4:00PM. The rain alternate date will be Sunday, October 27th.
WHERE: Outdoor location kept private for those who register.
HOW: Please email me or call 202.436.2825 for more details and to reserve a time slot.
Reserve your spot soon! Hope to see you there!
Reserve your spot soon! Hope to see you there!
24 September 2013
:: Photography Tips + Tricks: choosing a dSLR lens | part one ::
As I mentioned last week, I generally do not recommend getting the kit lens that is usually sold with the camera as a set. Why? Because 1) the image quality is probably not going to be great (unless you are purchasing a pro set) and/or 2) the focal length range and/or aperture range may not be ideal for your needs. By choosing a lens purposefully, you are in control of the style and look of your images.
The two most important properties of the camera lens are the FOCAL LENGTH and the APERTURE. These values together describe the lens, and are generally printed on the barrel of the lens itself.
The lens focal length (usually represented in millimeter or mm) gives us 1) the angle of view = how much of the scene will be captured, and 2) the magnification = how large individual elements will be.
The lens aperture (usually represented in f/stop values) is the size of the opening in the lens diaphragm through which light passes -- larger the f/stop value, smaller the opening; smaller the f/stop value, bigger the opening. For instance, an aperture of f/.2 has a larger opening than an aperture of f/4, which means the f/1.2 will allow more light to pass through the lens, giving more exposure. Aperture size also affects how blurry your background will be. A blurry background will not only direct attention to the elements in focus, it could also help camouflage a messy, cluttered scene.
The two most important properties of the camera lens are the FOCAL LENGTH and the APERTURE. These values together describe the lens, and are generally printed on the barrel of the lens itself.
The lens focal length (usually represented in millimeter or mm) gives us 1) the angle of view = how much of the scene will be captured, and 2) the magnification = how large individual elements will be.
The longer the focal length = narrower angle of view + higher the magnification
The shorter the focal length = wider angle of view + lower the magnification
 |
| Courtesy of Dave Black/Nikon USA |
The lens aperture (usually represented in f/stop values) is the size of the opening in the lens diaphragm through which light passes -- larger the f/stop value, smaller the opening; smaller the f/stop value, bigger the opening. For instance, an aperture of f/.2 has a larger opening than an aperture of f/4, which means the f/1.2 will allow more light to pass through the lens, giving more exposure. Aperture size also affects how blurry your background will be. A blurry background will not only direct attention to the elements in focus, it could also help camouflage a messy, cluttered scene.
 |
| Nikon USA |
The lower the f/stop = larger opening in the lens + less depth of field + blurrier background
The higher the f/stop = the smaller opening in the lens + greater depth of field + sharper background
 |
| Nikon USA |
If you are someone who wants an all-around good lens that will do well in different scenarios, a zoom lens with variable focal lengths might be the best option for you. On the other hand, you might find a prime lens with a fixed focal length more suited to your style of shooting because 1) it is lighter & more compact, and 2) it will most likely have a lower f/stop value (f/1.2 to f/2.8), which will allow you to shoot in low-light conditions.
Please check back next Tuesday for "Choosing A dSLR Lens | Part II." I will tell you which lenses, I feel, are best for close-up portraits, and which ones are best for images that use the environment to tell a story.
Also, check back tomorrow for details on this year's *HOLIDAY MINI PHOTO SESSIONS*. I am doing them a little differently this year, so stay tuned!
Also, check back tomorrow for details on this year's *HOLIDAY MINI PHOTO SESSIONS*. I am doing them a little differently this year, so stay tuned!
18 September 2013
:: BINKIES+NOSEPRINTS in the Huffington Post ::
Happy Wednesday! Hope you are all enjoying a preview of wonderful Fall weather where ever you are!
Big thanks to generous blogger Jamie Davis Smith, for the mention of B+N{PHOTOGRAPHY} in her latest post on the Huffington Post. It is such an honor to be in the company of successful and creative people in the industry.
If you'd like to learn how to take better family photos for this year's holiday cards, but prefer a more personalized lesson plan and individual attention, please contact me for bespoke photography lessons tailored just for you. I'd love to spend some one-on-one time with you!
Also, I am now booking Fall sessions and Fall Minis. Please contact me for more information. Thanks!
Here's a shot from one of my favorite mini clients :-) :
17 September 2013
:: Photography Tips + Tricks: choosing a dSLR camera ::
If you are reading this, chances are you already own a
camera and are ready to 1) make the jump from a point-and-shoot to a dSLR
(digital single lens reflex), or 2) upgrade your current dSLR to a model with
more advanced features.
Depending on your need, dSLR camera prices range from a
couple of hundred dollars to thousands. Canon, Nikon and Sony are some popular
brands that offer models for pros, advanced amateurs and hobbyists.
*DISCLAIMER: I have been a Canon girl from the start, so the
examples I provide are going to be Canon-centric*
For the hobbyist who is interested mostly in taking photos
in social situations and while travelling, an entry-level dSLR will do the
trick beautifully. An entry-level camera will most likely have a lightweight polycarbonate
housing great portability but may not be as weatherproof and durable as a
semi-pro or pro model. My first dSLR is the Canon T2i, which I still bring to
shoots sometimes as a backup. The latest iteration of that camera is the Canon
T5i, which retails for about $750.00
(camera body only, no lens). Another entry level Canon that is popular with
beginners is the Canon SL1, which retails for about $600.00 (camera body only,
no lens). Nikon’s comparable models are the D5200 and D3200, respectively. Sony
offers quite a large range of beginner dSLRs that are very reasonably priced.
For the amateur/semi-pro photographer who is ready to
upgrade their camera to a more durable body with more advanced manual features,
Canon’s 6D is the one to beat in my opinion. In addition to having a durable,
weatherproof, dustproof housing, the 6D is Wi-Fi and GPS enabled. You can
control the camera’s exposure settings (aperture, shutter speed, ISO) remotely
from your smartphone, review images from your camera on a smartphone or tablet,
and transfer files wirelessly to a storage device. In addition, you can share
images with other Wi-Fi enabled devices (HDTV, tablet, cameras). The 6D also
features a full-frame sensor that was previously offered only in the pro
models. The larger full-frame sensor (vs. a crop sensor) has the potential to
produce richer images with more depth and range. The Canon 6D retails for about
$2,000.00 (camera body only, no lens).
Whether you are looking to fine-tune your techniques or
thinking of starting a photography business, the Canon 5D Mark iii is, in my
opinion, THE camera to consider. This upgrade from the 5D Mark ii features a
61-point high density reticular Auto Focus system that is highly accurate and
works well in low-light environments. The only downside of the Canon 5D Mark
iii is the price point – it retails for about $3,500.00 (!!!). The Nikon D800,
at $3,000.00 a pop, features a whopping 36.3Mp sensor, allowing you to enlarge
images up to 23.4 x 33.1” / 59.4 x 84.1 cm at 200 dpi, without sacrificing
details and clarity.
One important thing to keep in mind when choosing a camera
is this: which camera body you have is not nearly as important as the lens(s)
that you use with it – especially when cost is a consideration. In my opinion, investing
in a good piece of “glass” is more important than having a fancy, feature
filled camera. The lens will ultimately determine the quality, look and style
of your images, allowing your creativity to shine through.
So check back next week for Tips + Tricks on how to choose a
lens for your dSLR! Why you should just say 'NO!' to kit-lenses!
As always, if you'd rather have some one-on-one time with me, you are always welcome to contact me to schedule a private lesson.
As always, if you'd rather have some one-on-one time with me, you are always welcome to contact me to schedule a private lesson.
 |
| Camera: Canon 5D Mark ii | Lens: Canon 24-70 mm L | Exposure Settings: ISO 320 , 50 mm, F/2.8, 1/500 sec | Processing/Editing: Lightroom 5 and Photoshop CS6 |
Subscribe to:
Posts (Atom)